Among all the craziness of renovating our kitchen I have been working on decluttering and organizing the rest of my house. One of the places that needs major help is my crafting space. Any of you who have craft supplies knows how this stuff multiplies. There are lots of itty bitty pieces, etc.
One thing I was not happy with was my ribbon storage. My old storage was similar to what many people have with the ribbon being stored on their original spools hanging on the wall. I used some curtain rod holders, spray painted them white and hung them on the wall. I used inexpensive wooden dowels and painted them green (you can't see them in the picture). I then painted plain old clothespins turquoise blue and used these to keep the dowel from falling off the curtain holder.
 |
| There were actually three rows of ribbon and I was getting ready to add a fourth! |
What I liked about this set up:
- I could see all my ribbon at once.
- Okay, that was really it. There was nothing else I liked about having them on the wall.
What I did not like about it:
- It takes up a lot of wall space.
- The ribbons would get dusty.
- Sometimes a ribbon would just fall off the spool .
- If I wanted to use ribbon somewhere other than my craft room I had to take the whole thing down and half the ribbons off to get to the one I wanted.
So I started doing some research on different storage options. I didn't want to spend a lot of money (let's say under $5) and the new storage needed to address my concerns above while still allowing me to see all my ribbon at once. Pretty tall order, right? I actually found so many great ideas. You have to love google image!
Option 1: Ribbon Ring
As much as I really like this idea, I didn't think it was going to work for me. For one, it was going to cost too much money. It isn't overly expensive but wouldn't keep me within my insanely low $5 budget! Plus, I have small kids. And cats. I could see this turning into a huge mess of a disaster. It sure does look pretty though, doesn't it?
Option 2: Gutters
I love this idea because each individual spool can be taken out easily. Since spools are not hanging on a rod then you don't have to worry about the ribbon falling off them either. But, this didn't really save any space for me and it is not a cheap project when you figure in all the end cap pieces for the gutter. So, onto option #3.
Option 3: Wrapped Up Ribbon
Okay, getting closer. This was inexpensive enough. All you need is a basket - which I already have a ton of - and foam board. You can get this at Dollar Tree super cheap! But, as much as I love, love, love this idea, I have a lot of ribbon. And not just your traditional thin scrapbooking ribbon. I have a lot that is 1" to 3" wide. So, unfortunately, this was not going to work for me. The search continues . . .
Option 4: Individual Ribbon Card Holders
We have a winner!! :)
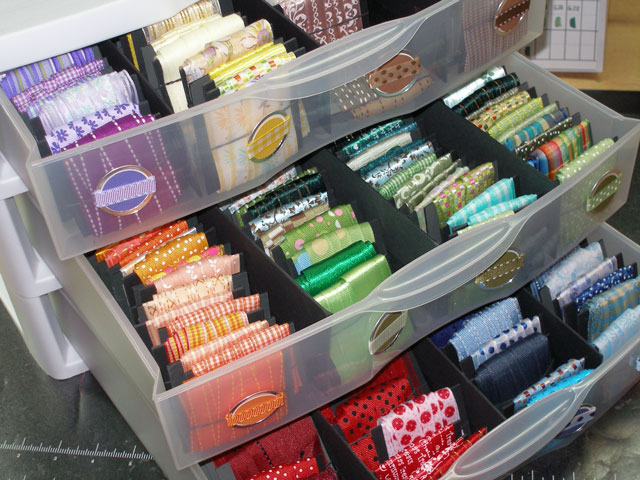
This was perfect for me. Each ribbon is wrapped up on it's own little cardboard square. And the squares could fit in a small plastic bin of sorts. (I don't have nearly as much ribbon as pictured above!). She used those 12 x 12 three drawer bins. I would never fill even one drawer! But the idea seed was planted and I was off to get started.
This is what it looked like when I was finished. I found a cheap ($3.50) plastic box with a lid at Dollar General. It was originally intended for 8 1/2" x 11" paper storage. I had all the cardboard on hand to make the little cards. Each card ended up being approximately 2 1/4" x 2". The dividers are made out of an old corrugated cardboard box cut to fit. As you can see I still have a whole other row to add ribbon to!
With the lid on I don't have to worry about the ribbon getting dusty or ribbon falling out. Plus the little blue side handles lock the lid down - perfect to keep out prying kid hands!
Each ribbon is wrapped on a cardboard square and then secured with a pin (it is what I had on hand). You could also use a small rubber band to secure your ribbon.
This takes up way less space and seems to be working perfectly. I can take this little box anywhere I need to. I am still trying to finalize what I am going to do with my ribbon that is more than 2" wide.
Labels: Crafts, inexpensive, Organization, scrapbooking